Wednesday 4 June 2014

MUA Nail Polish Review and Swatches

I started my collection of MUA nail polishes about a year ago, when I purchased a few as I was attracted by their £1 price tag. I now have 5 in a variety of shades, and I have to say, for such a low price they are pretty good! Some are more sheer than others and require a bit more building, however all colours applied opaquely within 3 coats. All the swatches are without a top coat to show the true finish.


Here are swatches of the 5 colours on my nail wheel:
L-R: Bullet, Frozen Yoghurt, Natural Days, Pistachio Ice Cream, Bold Blue

Bullet:

This colour is a slate grey colour, which applies evenly in 2/3 coats. It is quite a runny formula but that could be because it is one of my latest purchases. I bought this colour as grey was the ONLY colour I was missing from my nail polish collection! I can now do nail art with elephants in, yay!


Frozen Yoghurt:

This is a beautiful blue toned purple colour, which applies evenly in 2 coats.


Natural Days:

This is one of my favourite nail polish colours from my whole collection. It is a light, pastel baby pink which looks amazing in any season. It is such a beautiful spring colour especially, and applies nicely with 2 coats. It is not as shiny as the other polishes for some reason, however I still love it.


Bold Blue:

This is my most recent nail polish purchase which I recently got in Superdrug 3 for 2, along with 2 MUA lipsticks. It was crazy how I got a nail polish and two lipsticks for just £2! I picked this colour out as I have nothing like it, and thought it would be a really pretty poolside blue for the summer. It is the runniest of the bunch and requires 3 coats for an opaque look, but this could be because it is new and will take a few openings to thicken up a bit (I found the others did this too as with most polishes).


Pistachio Ice Cream:

This is my favourite out of all these colours! It is a pale greeny blue mint colour (in the picture it is coming off more green than real life, sorry about that). It is such a beautiful colour with such a cute name, and only needs 2 coats. I often get compliments on this colour from people on instagram and in real life. It really does remind me of ice cream and summer, and I love it.


Overall I really love these nail polishes and they are amazing value for money. I will definitely be buying more in the future and I urge you to try them if you haven't already!

Tuesday 3 June 2014

Drugstore Red/Purple Lipsticks

When my new camera arrived this morning, I felt inspired to try something new on my blog as taking photos is so much easier now with the flip out screen, so is perfect for lipstick swatches. I was sorting through my lipsticks earlier today and just randomly swatched some on my hand, and thought it was something I could write about. I thought I would do a mini review/ swatches of 4 of my favourite deeper shade lipsticks from the drugstore, as I at the moment I am obsessed with looking at lipstick swatches online. These lipsticks are all under the £10 mark and are easily available from Superdrug or Boots here in the UK.

L-R: Revlon in 'Black Cherry', Rimmel Apocalips in 'Eclipse', Maxfactor Lipfinity in 'Frivolous', MUA in 'Shade 2'
Firstly
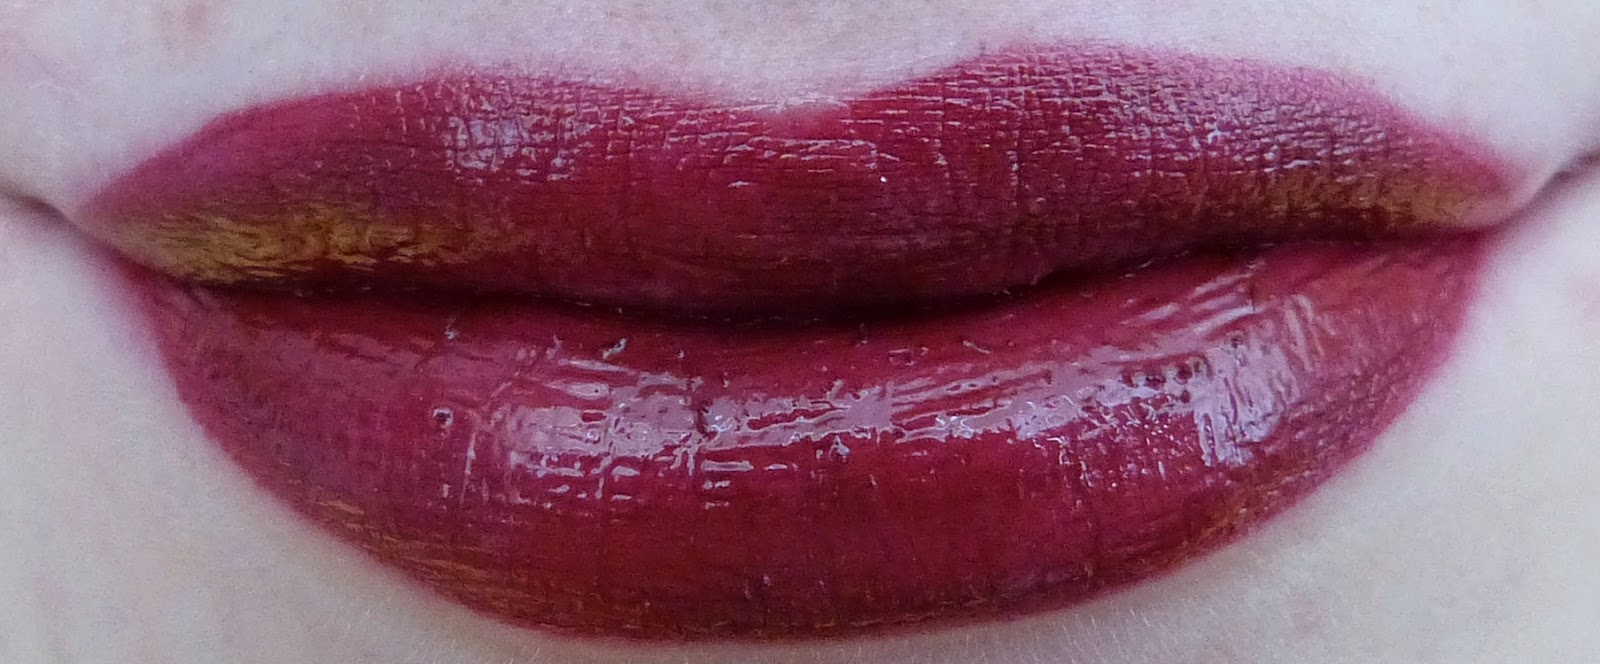
: Revlon- Black Cherry

This is the darkest of the bunch; a deep reddy purple colour which makes the perfect vampy lip. It is a creamy formula which is highly pigmented, and gives quite a glossy finish. It is quite moisturising and feels smooth on the lips. However I do feel it is best to exfoliate your lips before applying it, as it can get caught on dry patches. I love this lipstick especially in winter, but also wear it in summer to for evenings out. I think this would suit most skin tones, as I am super pale but still manage to pull it off! 

It looks black in the tube, however when applied to the lips it is not as dark, and comes off a nice dark plum colour.


Maxfactor Lipfinity in Frivolous (108)

This is definatly the longest lasting lipstick in my entire collection. Slightly lighter than Revlon Black Cherry, but still a deep plum shade, which is slightly less purple. This lipstick is unique in that it comes with 2 products- first you apply the liquid lipstick colour neatly to your lips, then wait for it to dry for 60 seconds. Then you apply the glossy lip balm/gloss that also comes with this lipstick. After this, it literally lasts all day. I have worn it for an entire day, through eating, drinking, and found it was still going strong by the end of the day. The only downside to this is it can be very difficult to take off, and you have to be very careful how you apply it, because once it's dried, it is there for good! 


The lipstick dried matte before the gloss balm

After the gloss balm


Rimmel Apocalips in Eclipse

I have a few colours from the Apocalips line, and I really love them all. They are very moisturising and glossy as they are a liquid lipstick- a cross between a gloss and a lipstick. This colour 'Eclipse' is a dark red colour that is buildable. It can be applied sheerly and blotted to create a brighter red look, but it can also be layered to create a darker red, which I prefer. It also dries to a slightly less glossy finish and leaves a nice stain on the lips when it rubs off. 


Finally: MUA in Shade 2

This lipstick was only £1 in Superdrug, which is such an amazing bargain! I have tried a few of the MUA lipsticks now (blog post soon) and really love them. They are extremely creamy and smooth and glide on like a dream. The colour pay off is also great, and I think for only £1, you can't really go wrong. This shade is a light pinky purple plum colour with a highly glossy finish. This colour is the perfect plum for summer if you are looking for something purple that is not too in your face. It would be a lovely every day plum colour and I can't wait to wear it more! 

I think I applied this weirdly, my lips can't be that wonky.. fail


Thanks for reading, hope this was helpful! xxx


Friday 30 May 2014

Taylor Swift Nails! 'Speak Now'

When asking for requests on my Instagram for what to do on my nails next, one follower had the awesome idea to do nails inspired by your favourite CD cover. As soon as I read the idea I instantly thought of Taylor Swift's 'Speak Now'. Taylor is my all time favourite artist and I felt really inspired by this album art as it looks so magical, and 'enchanting'.. The vibrant purple colour and the glitter really make for a beautiful album cover. So I thought I would go ahead and try it out- Speak Now Nails. 


This was my inspiration. I am lucky enough to own a signed copy myself, which I bought from Taylor's Speak Now tour a few years ago. However when photographing the colours did not show true to life, so I thought I would grab one from the internet as well.


So here is a close up of the nails. I used a shimmery purple base by NailsInc in the colour 'marylebone lane' to start off with. I then used 2 different glitters to create a faded glitter effect, firstly Barry M's 'Diamomd Glitter' (it is genuinely spelt like that on my bottle, not sure if thats right...?) and over the top of that, I used Sinful Colours 'Queen of Beauty'. For the writing and extra glitter/star things I used some white nail paint from eBay, and a very tiny nail art brush. 


The finished product! I really love these, especially because they are inspired by my favourite artist, Taylor Swift. I actually have also done some nails inspired by 'Red' back in February for Taylor's Red tour in London, which can be seen on my instagram! Thanks for reading! xxx

Monday 26 May 2014

Sunday 25 May 2014

'Velvet' Nails

Having seen a few people try out the 'velvet' nail trend, I wanted to see what it was like. Believe it or not I actually found some pots of nail art fibres in my local Poundland; only 6 colours for £1! The set I bought came with black, red, light pink, dark pink, blue, and purple. An interesting colour selection, however for only £1 it was hardly breaking the bank to try out the trend. I chose to add some red velvet to my flower mani that I was already sporting (check my instagram to see it). To apply the fibres I painted my nails with one coat of red polish, then a layer of top coat, using tweezers to drop clumps of the fibres onto my newly painted nails. After pressing them down a little and leaving them to dry for a minute or two, I used a fan brush to sweep away the left over fibres back into the pot. Et voila! 


I would definitely recommend doing this over a tray or plate or something that will catch the excess fibres to avoid making a mess...


I actually quite like the effect it created, although it was just a bit of fun and personally not something I would wear on a daily basis! Definitely something to try if you are looking for a unique look on your nails, and easy enough for beginners. What do you think?

close up of the furry texture

Friday 16 May 2014

Flip Flop Fantasy Review

China Glaze Flip Flop Fantasy: For starters, I had never tried any China Glaze nail polishes before this one. I was so interested to see what all the hype was about at it has been such a popular colour for so long. In pictures I had seen it looked like a bright coral colour, however I did not realise just how bright it would be! If you are looking for a neon orangy coral, this is the perfect shade. It is so neon and bright but so so pretty, and a fantastic colour for summer. It actually makes you look more tanned, which is always a plus (especially when you have vampire skin like me). The colour dries with a semi-matte finish with a slight gloss to it, but mostly matte. Under some lighting it actually looks fully matte, in others you can see a slight gloss.  A top coat can be added to give a gloss finish. The photo really does not do the colour justice!

China Glaze: Flip Flop Fantasy Swatch
One downside to this polish however is that when left matte it can chip quite easily. However, I did find that when I used a gloss top coat over the top it did not chip as much. I have used it in a few nail designs so far and will be sure to use it in many more, especially as summer approaches. Here are a few of my designs so far. The leopard print shows the colour much more true to life!
Taken in artificial light
Taken in natural light. A much better representation of the true neon colour!
Overall, I absolutely love this colour and it is definitely a must have for summer! Thanks for reading :)

Wednesday 7 May 2014

Daisy Nails


Hi everyone, these are my latest nails that are part of the nail art challenge I am doing on instagram. These nails were inspired by onenailtorulethemall and were for the 'floral nails' design. I really like how they turned out, and have had lots of compliments on them! Hope you like them :)
Below are the products I used to create this design: 
First I used nails inc in 'New York Noir' and painted 2 coats of black. After this has dried, I used a dotting tool from ebay which can be found in a set here: http://www.ebay.co.uk/itm/5-x-Nail-Art-Dotting-Pen-Marbleizing-Tool-Set-Manicure-Painting-Kit-2-Way-UK-/161129980246?pt=Nail_Polish&hash=item2584186156 I then used white polish from NYC to create the flowers and added a yellow dot in the middle using nail art paint, also from ebay. I used some caviar nail beads from a nail wheel from Primark.